Know the rules The Paceline Forum Builder's Spotlight


Go Back   The Paceline Forum > General Discussion

Reply
 
Thread Tools Display Modes
  #76  
Old 05-08-2018, 07:08 PM
m4rk540 m4rk540 is offline
Senior Member
 
Join Date: May 2013
Posts: 772
Quote:
Originally Posted by sfhbike View Post
Sorry, who is that? And what's his number.
He's former Reynolds, Serotta carbon guru. He made the F Forks and tubes for Serotta's carbon bikes. He'll just repeat DRietz advice. Use your old fork.

Take the store credit and apply it to a Moots stem or seatpost.

Last edited by m4rk540; 05-08-2018 at 07:11 PM.
Reply With Quote
  #77  
Old 05-08-2018, 07:21 PM
hollowgram5 hollowgram5 is offline
Senior Member
 
Join Date: Sep 2014
Location: Sandy Eggo
Posts: 1,958
Quote:
Originally Posted by sfhbike View Post
Sorry, who is that? And what's his number.
Quote:
Originally Posted by m4rk540 View Post
He's former Reynolds, Serotta carbon guru. He made the F Forks and tubes for Serotta's carbon bikes. He'll just repeat DRietz advice. Use your old fork.

Take the store credit and apply it to a Moots stem or seatpost.
In addition, he makes and sells forks through Bill Holland; Holland frames can be purchased with a Mike Lopez fork. I considered one for my Isogrid, but landed a good deal on an Enve instead.

From what I understand, he's a big portion of the HC frames that Holland has been putting out, and why they ride so well.

Additionally, he's a member of the forum and a composites geek.
Reply With Quote
  #78  
Old 05-08-2018, 07:23 PM
sfhbike sfhbike is offline
kid transporter
 
Join Date: Nov 2007
Location: Ventura, California
Posts: 366
Quote:
Originally Posted by hollowgram5 View Post
In addition, he makes and sells forks through Bill Holland; Holland frames can be purchased with a Mike Lopez fork. I considered one for my Isogrid, but landed a good deal on an Enve instead.

From what I understand, he's a big portion of the HC frames that Holland has been putting out, and why they ride so well.

Additionally, he's a member of the forum and a composites geek.
What's his username?

EDIT: Nevermind "Mike Lopez"
Reply With Quote
  #79  
Old 05-08-2018, 07:45 PM
Kontact Kontact is offline
Senior Member
 
Join Date: Apr 2011
Location: Sunny Seattle
Posts: 2,824
Quote:
Originally Posted by m_sasso View Post
If you want to use the fork purchase yourself an 8mm bottom drill bit increase the depth of the brake recess bolt hole 3mm, purchase yourself the longest brake recess bolt usable 2mm shorter than the depth of the recess bolt hole. You will net your required threaded depth and you will not die. The shouldered recess bolt and remaining fork material will support the brakes adequately.

Done!
Given a choice of losing carbon to gain steel, I think I'd stick with having few-ish threads. Failed brake nuts aren't likely to cause a crash.
Reply With Quote
  #80  
Old 05-08-2018, 08:04 PM
cmbicycles cmbicycles is offline
Senior Member
 
Join Date: Apr 2012
Location: Richmond, VA
Posts: 5,061
Does this fork have an alloy crown or insert where the brake mounts, or is it all carbon?
Reply With Quote
  #81  
Old 05-08-2018, 08:22 PM
hokoman hokoman is offline
Senior Member
 
Join Date: Jun 2004
Location: Lisbon PT & Brooklyn NY
Posts: 2,089
Did you try a different brake caliper? If it's a 45 offset, sell me the fork and put your edge back on. I'll deal with the headache.
Reply With Quote
  #82  
Old 05-09-2018, 10:12 AM
sfhbike sfhbike is offline
kid transporter
 
Join Date: Nov 2007
Location: Ventura, California
Posts: 366
Quote:
Originally Posted by cmbicycles View Post
Does this fork have an alloy crown or insert where the brake mounts, or is it all carbon?
I'd have to take a closer look, but my guess is it's all carbon. Why?
Reply With Quote
  #83  
Old 05-09-2018, 12:00 PM
cmbicycles cmbicycles is offline
Senior Member
 
Join Date: Apr 2012
Location: Richmond, VA
Posts: 5,061
Quote:
Originally Posted by sfhbike View Post
I'd have to take a closer look, but my guess is it's all carbon. Why?
If it's an aluminum insert, it would be no big deal (imo) to drill it a couple mm deeper.
Reply With Quote
  #84  
Old 05-10-2018, 10:56 AM
sfhbike sfhbike is offline
kid transporter
 
Join Date: Nov 2007
Location: Ventura, California
Posts: 366
Mike Lopez had some very helpful feedback. If the fork is indeed solid carbon all the way through (anyone know for sure?), here's what he recommends:

Quote:
If that's the case then you should be safe pushing the c'bore a bit deeper to get a few more threads of engagement. I would not hesitate to do that on any of the products I've made over the years. However, as I said, I honestly don't know how THAT one is made so it's your call. Or...get someone to ask Butch. He'll know what's inside there.

If you do decide to go for it you don't need a flat faced bit. A normal 8mm bit will work fine because you're just creating clearance, not a mating surface. And don't go crazy with a hand drill! Better to use a drill press so you can better control the depth or even by hand with the bit in a tap handle or old chuck etc. With a sharp bit it will cut easily and will be less likely to bind. Easy to control depth as well.
As soon as I confirm from Moots whether there's some sort of insert or if it is just carbon, I'll likely use the tap and drill bit as he recommends to get another 2-3mm of material out of that hole.
Reply With Quote
  #85  
Old 05-10-2018, 11:27 AM
Kontact Kontact is offline
Senior Member
 
Join Date: Apr 2011
Location: Sunny Seattle
Posts: 2,824
Quote:
Originally Posted by sfhbike View Post
Mike Lopez had some very helpful feedback. If the fork is indeed solid carbon all the way through (anyone know for sure?), here's what he recommends:


As soon as I confirm from Moots whether there's some sort of insert or if it is just carbon, I'll likely use the tap and drill bit as he recommends to get another 2-3mm of material out of that hole.
Put a thin layer of tape around the bit so it is less likely to open up the outer shoulder.

You're only removing 2mm, right?
Reply With Quote
  #86  
Old 05-10-2018, 11:31 AM
m_sasso's Avatar
m_sasso m_sasso is offline
Senior Member
 
Join Date: Feb 2012
Location: Vancouver, BC
Posts: 4,065
Easy to make a flat bottom drill, https://www.youtube.com/watch?v=qwuSBJFa5uM

Thanks for posting up Mike's response, have fun and be sure to obey all stop signs.
__________________
Marc Sasso
A part of the resin revolution!
Reply With Quote
  #87  
Old 05-10-2018, 11:47 AM
sfhbike sfhbike is offline
kid transporter
 
Join Date: Nov 2007
Location: Ventura, California
Posts: 366
Quote:
Originally Posted by Kontact View Post
Put a thin layer of tape around the bit so it is less likely to open up the outer shoulder.

You're only removing 2mm, right?
Good tip. Thanks. That combined with using a bit in a tap rather than a drill should make this idiot proof for me.

I'll need to play around with measurements a bit after I order a new nut and try everything with the washers I'm using. I'm thinking 3mm off with a 14mm nut should do the trick.
Reply With Quote
  #88  
Old 07-22-2018, 12:01 AM
sfhbike sfhbike is offline
kid transporter
 
Join Date: Nov 2007
Location: Ventura, California
Posts: 366
Finally got around to finishing this up. I used a tap and drill bit for a while, but that was slow going. I switched to a hand drill with some tape around the bit to keep it from taking any material on the sides and drilled carefully (short bursts, measure, rinse, repeat). I ended up taking about 5-6mm off in order to get the 18mm Campy nut to seat all the way in. Plenty of thread engagement now, and everything fits great.

Thanks for all the tips. If anyone wants an EDGE fork, I'll be listing it shortly.
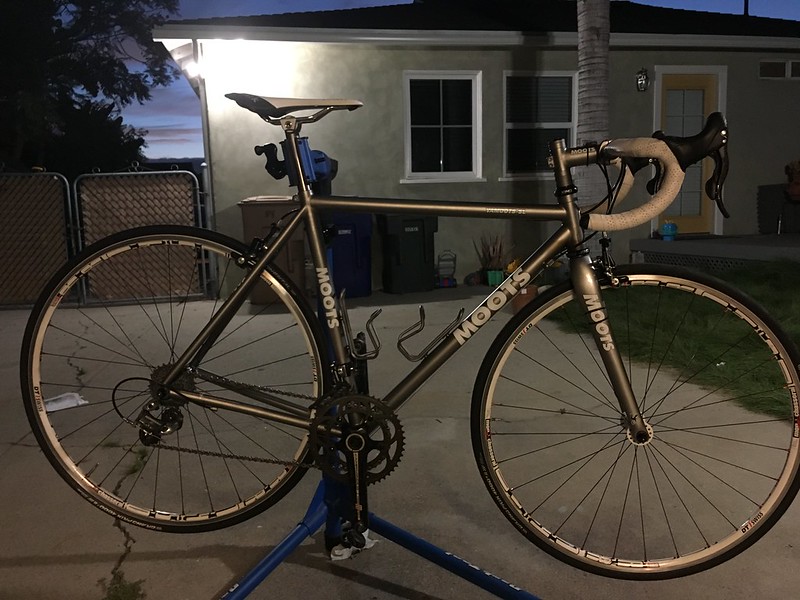
Reply With Quote
  #89  
Old 07-22-2018, 01:48 PM
dddd dddd is offline
Senior Member
 
Join Date: May 2016
Posts: 2,207
Good to go. This post got me to thinking why someone said that 6 threads of engagement were needed.

In discussions with engineers, I've heard that 3 threads is sufficient to realize full tensile strength of a relatively coarse-threaded bolt such as the stud.

There is no cyclic loading (in tension or in bending) of the threaded engagement in use, since the toothed washer and adjacent faces do not rock relative to one another. An exception might occur if the bolt lost most of it's tension, so possibly having only 3 or 4 threads engaged might lead to further loosening in such instance.

More than three threads of engagement does enable threadlocking compounds to be more effective, and use of an alloy nut would require more threads of engagement, but installed with fresh Loctite I would think that 3-4 threads of engagement would be perfectly safe using a steel nut.

Also, it is normal for a tensioned brake stud installed in a carbon frame to lose enough tension after a day or two to allow some additional amount of nut rotation to achieve the original torque, (if only a small amount).

I've seen mechanics and even carpenters struggle with "squeeker" scenarios like this where just a small amount of additional clearance needs to be established. Some didn't end well, but usually some fudging is fine.
I've had the spring-retaining tab break off of a front derailer's link when I hastily tried to use judicious sanding (where the link met the seat tube upon shifting to low gear on a triple). That one stuck with me for the last ten years, now it's more "measure twice, cut once" than ever.

Last edited by dddd; 07-22-2018 at 01:51 PM.
Reply With Quote
  #90  
Old 07-22-2018, 06:27 PM
sfhbike sfhbike is offline
kid transporter
 
Join Date: Nov 2007
Location: Ventura, California
Posts: 366
Yes, 4 threads would probably have been enough but I was following campy’s spec which calls for 6. I’m still surprised that Moots builds the forks this way. Since the solution was pretty straightforward, the piece of mind was worth it. I now have probably 10mm of threads engaged and threw on some blue loctitte for good measure. Overkill I’m sure but I never have to think about it again!

Quote:
Originally Posted by dddd View Post
Good to go. This post got me to thinking why someone said that 6 threads of engagement were needed.

In discussions with engineers, I've heard that 3 threads is sufficient to realize full tensile strength of a relatively coarse-threaded bolt such as the stud.

There is no cyclic loading (in tension or in bending) of the threaded engagement in use, since the toothed washer and adjacent faces do not rock relative to one another. An exception might occur if the bolt lost most of it's tension, so possibly having only 3 or 4 threads engaged might lead to further loosening in such instance.

More than three threads of engagement does enable threadlocking compounds to be more effective, and use of an alloy nut would require more threads of engagement, but installed with fresh Loctite I would think that 3-4 threads of engagement would be perfectly safe using a steel nut.

Also, it is normal for a tensioned brake stud installed in a carbon frame to lose enough tension after a day or two to allow some additional amount of nut rotation to achieve the original torque, (if only a small amount).

I've seen mechanics and even carpenters struggle with "squeeker" scenarios like this where just a small amount of additional clearance needs to be established. Some didn't end well, but usually some fudging is fine.
I've had the spring-retaining tab break off of a front derailer's link when I hastily tried to use judicious sanding (where the link met the seat tube upon shifting to low gear on a triple). That one stuck with me for the last ten years, now it's more "measure twice, cut once" than ever.
Reply With Quote
Reply


Posting Rules
You may not post new threads
You may not post replies
You may not post attachments
You may not edit your posts

BB code is On
Smilies are On
[IMG] code is On
HTML code is Off

Forum Jump


All times are GMT -5. The time now is 08:24 AM.


Powered by vBulletin® Version 3.8.7
Copyright ©2000 - 2024, vBulletin Solutions, Inc.