

|
|
|
#1
 03-24-2016, 11:55 AM
|
||||
|
||||
|
All pumped up! A Silca restoration thread.
All these Silca threads got me all pumped up and thinking… I have a vintage Silca Super Pista pump in need of TLC plus I haven’t taken on a restoration project in a long time, so here we go…
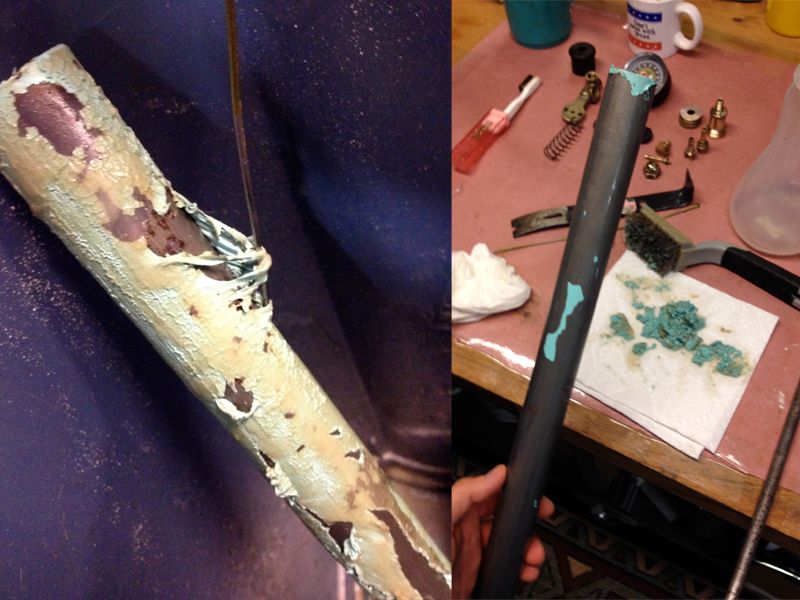
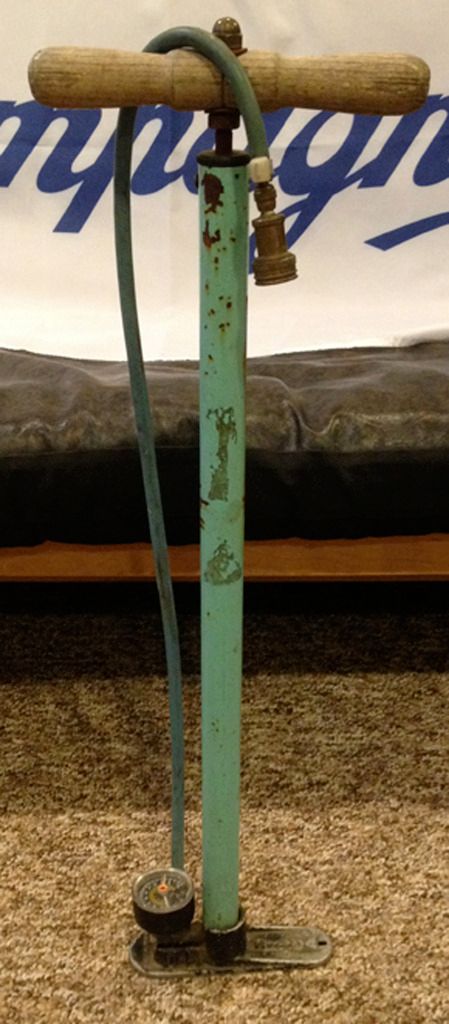   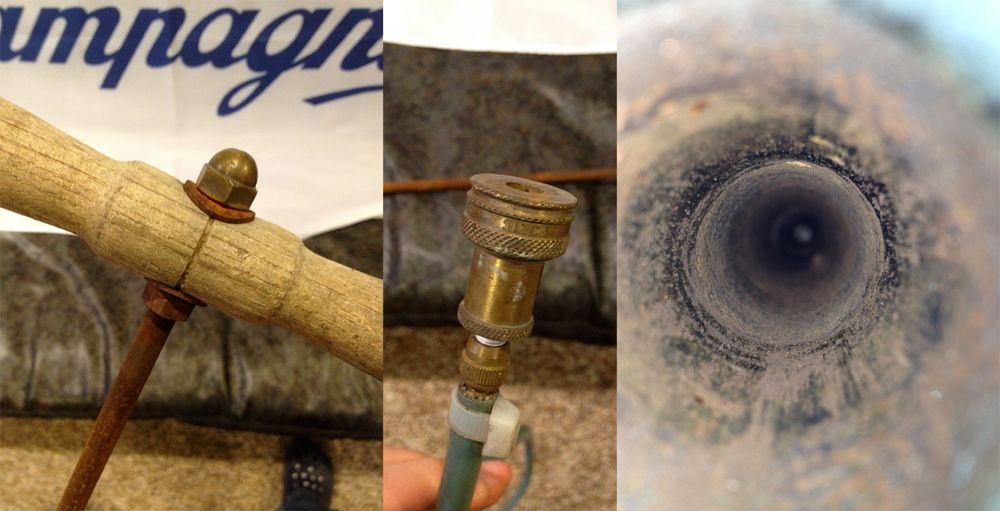 I have a bunch of questions for those who are familiar with these pumps. Taking it apart was very straightforward. Regrettably the pump is in rough shape to say the least. A repaint for sure, I want to do it myself (that’s the fun part) but I can't have any pudding if I don’t eat my veg. So first I would like to ascertain if it will be possible to make the pump operational again. Before I took it apart the pump it did not work, the leather washer was not holding air in the air chamber. I have no idea if the air pressure gauge actually works. Does it look ok? Can/should I take it apart and clean it up? The outside I plan to strip with Ready Strip, then sanding before priming and painting. I did notice a rubber seal at the very bottom of the pump. Is this removable? Should I remove/replace it? There is rust everywhere, inside and outside the tube. I was thinking some fine steel wool with baby oil inside the chamber would be ok? I also have a smaller vintage Silca Pista pump, this one does work , so I peeked inside and it appears to be greased inside. Grease or just gunky old oil? I was thinking I could use a lighter weight oil, maybe Slick Honey, I also have Rock Shox 0w-30 fork oil. The wooden handle is also in a sad state, it appears to be screwed on I tried to unscrew it, no dice! Is it glued on or sumthin? The bolts on top of the handle had some threadlocker on them and were not easy to remove. Can anyone please tell me what kind of paint maestro DP uses? I have searched high and low with no success. I am sure there are more questions floating around but for now that’s it. Is it true that larger Silca Super Pista also used Columbus tubing? It almost seems like I should be able to clean everything up, reassemble and it will work once again. I figured I would check with the experts before proceeding any further.  Grazie mille. Grazie mille.I will post pictures as I go along… Last edited by CampyorBust; 03-24-2016 at 06:20 PM. 
|
|
#2
03-24-2016, 12:14 PM
|
||||
|
||||
|
I'm the wrong person to offer advice on this. I had been using a Silca Super since 1988 (it was my first floor pump). I tried to refurb it last year and could never get it to work well. I threw it away and bought a nice Park Tool pump.
|
|
#3
03-24-2016, 12:34 PM
|
|||
|
|||
|
I wouldn't throw away your old Silca pump, especially if you're going to repaint it yourself! These old Silca were made out of Columbus tubing, I believe its SL, and my silca still has the decal on it!
Note, all parts are readily available. At the minimum, you're going to need a new leather washer and pump head gasket. Euro Asia Imports has all the parts and your LBS can get it for you. Here's a link to Euro Asia's silca parts list: http://www.euroasiaimports.com/Produ...93&viewAll=yes However, if you want to "upgrade" some of the parts, the new Silca sells replacement parts too and in some cases, many have been improved. http://silca.cc/collections/replacement-parts For example, the old silca 242 pump head washer was rubber: 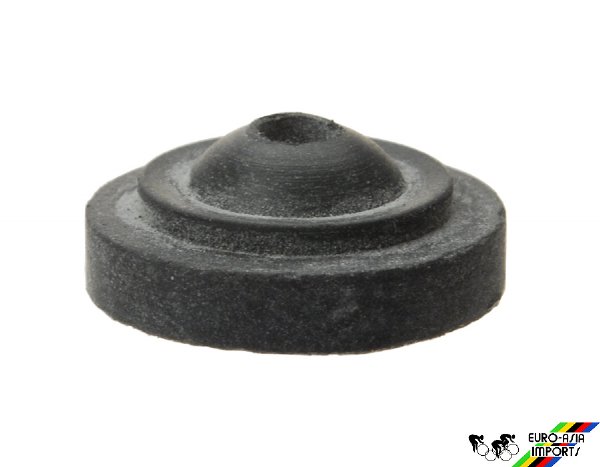 the new Silca sells a synthetic washer that suppose will last many years longer:  For the leather washer, the new Silca says "Updated from 2.25 to 2.50mm thick leather for improved durability." Don't forget to grease it when you put it back! So, lots of choices! I recommend you look at your parts, see what you can salvage, then get new parts. In most cases, the new Silca products may be a few dollars more, but it should make your pump last a lot longer. Good Luck! Last edited by bfd; 03-24-2016 at 12:41 PM.
|
|
#4
03-24-2016, 03:59 PM
|
||||
|
||||
|
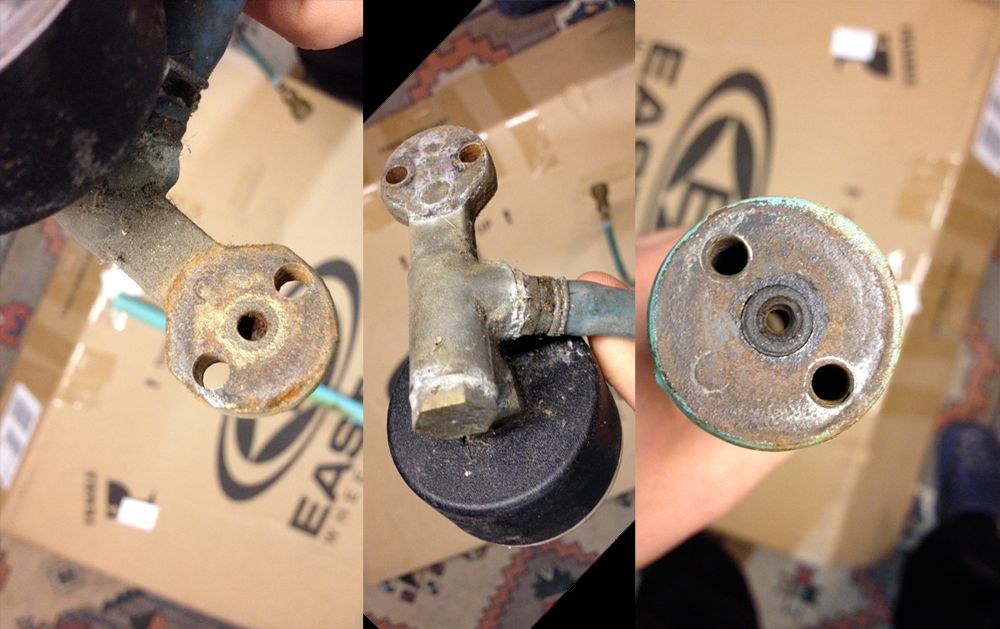
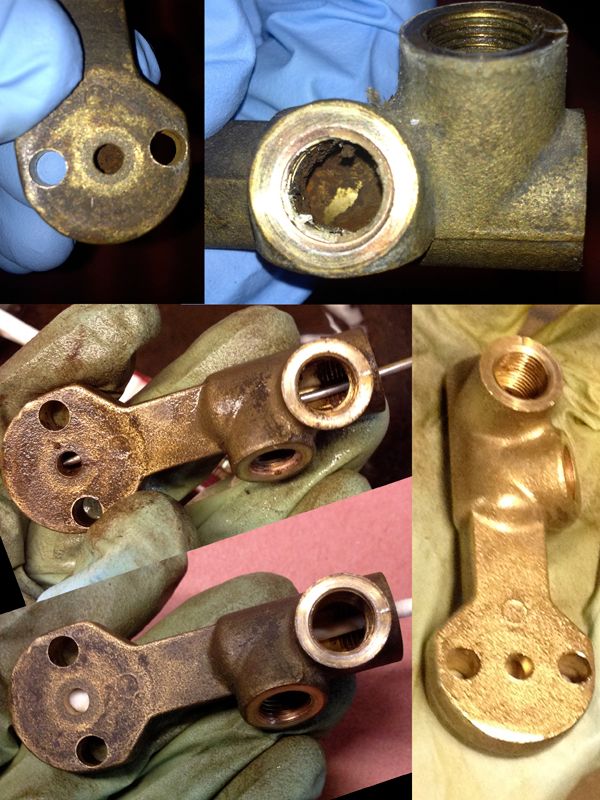
You are not done quite yet taking this apart
 . Don't forget the large nut near the dial gauge. The inner valve assembly needs to reviewed or replaced as well. With some cleaning and a few new parts I think you can this working well. . Don't forget the large nut near the dial gauge. The inner valve assembly needs to reviewed or replaced as well. With some cleaning and a few new parts I think you can this working well. Good luck
__________________

|
|
#5
03-24-2016, 06:41 PM
|
||||
|
||||
|
Thanks guys. This will not be my primary work pump for that I have my trusty Mr. Ed. This is more of an experiment really. Restoring functionality would be nice and looks to be feasible.
I knew the smaller Pistas were made out of Columbus, Super Pistas too then huh, good stuff literally! So grease it is, officially too according to Silca. No need to waste the good Phil Wood stuff I think I can get away with using Park grease, then again Slick Honey would be so much slicker. The leather washer and pump head washer appear to be in good nick, might not need to replace them after all. Found a good resource for Silca overhauls… (good pic of the inner valve assembly) https://16incheswestofpeoria.wordpre...working-again/ http://www.bikeforums.net/bicycle-me...tire-pump.html
|
|
#6
03-24-2016, 07:08 PM
|
|||
|
|||
|
You should only use vintage Campagnolo grease on an old Silca pump.
http://biketester.com/tag/campagnolo/
|
|
#7
03-24-2016, 07:22 PM
|
|||
|
|||
|
Send the barrel to Dario and have him paint it. You can then turn around and sell the whole thing as a "real old Masters' pump, not one of those newfangled ones they're selling today."
I bet you could easily get $5000. Re: the handle - I bet $0.05 that it isn't glued on there. I'd remove the acorn nut and washer and give it another good jiggle and tug.
|
|
#8
03-24-2016, 08:11 PM
|
|||
|
|||
|
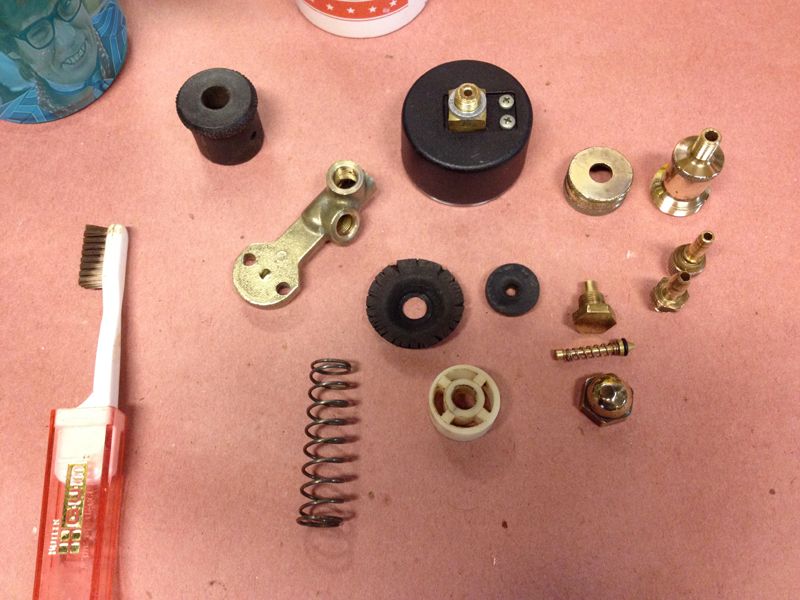
The only part you might have a hard time getting is the soft washers for the two bolts holding the bottom together. Slightly easier to get is the white plastic spacer under the leather. Save yours if you can.
Replace all other soft parts. Yes the o ring in the bottom should be replaced. The only oil I ever used inside my Silca was lightweight oil like Triflow. Some of my leathers are over 30 years old. Grease can get into the check valve and screws it up. You didn't take the valve apart in your photos. The spring had a tendency to rust and break. So inspect the before ordering parts. Well, maybe get one anyway, since the seal on it is probably hard anyway. There are no service parts for your gauge. It either works or it doesn't. Replace it if it doesn't work. You should be able to get decals for your pump, too.
__________________
Forgive me for posting dumb stuff. Chris Little Rock, AR Last edited by bikinchris; 03-24-2016 at 08:22 PM.
|
|
#9
03-24-2016, 08:28 PM
|
|||
|
|||
|
Quote:
|
|
#10
03-26-2016, 08:42 AM
|
||||
|
||||
|
gitin dirty
|
|
#11
03-26-2016, 08:57 AM
|
||||
|
||||
|
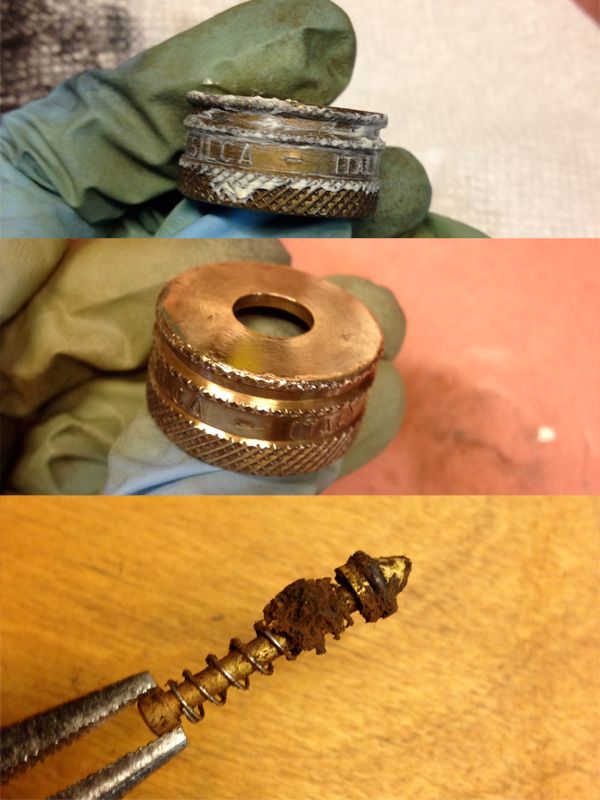
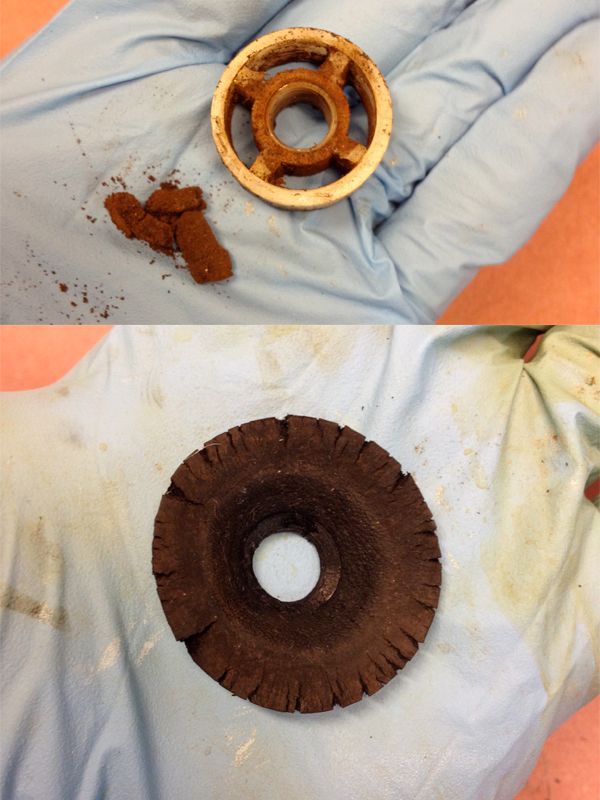
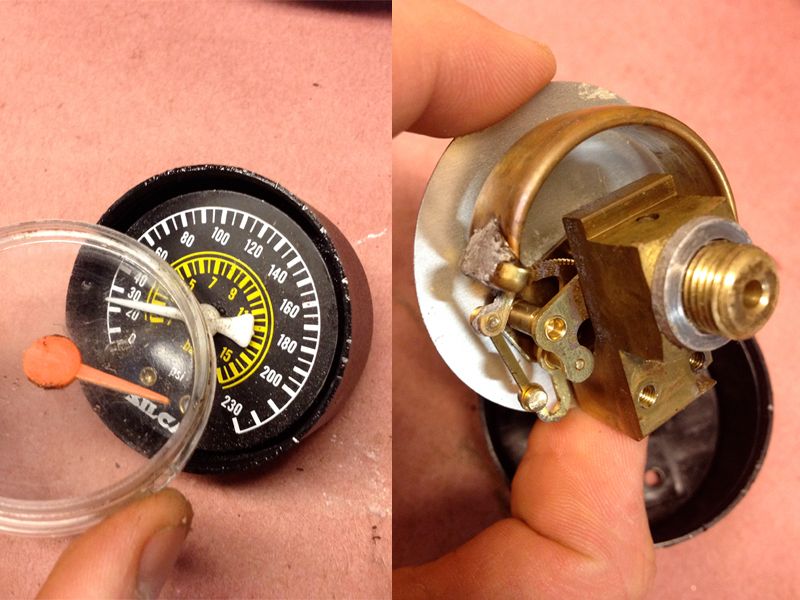
I took the gauge apart and it was really gunked up inside, everything cleaned up real nice and I think the vavle needle can be salvaged. The leather washer is toast, the pump head washer looks ok but I guess I can replace it too.
The wooden handle is indeed screwed and rusted on, anybody have any tricks for holding a metal rod in place without using a pipe wrench and gouging it? The gauge looks ok, no? I found no yellow arm thingy, and the indicator needle hovers around 25psi, I can't get it down to 0psi. Also should I be using white thread seal tape when I reassemble everything? This is how it was before, or will loctite suffice? I have blue and purple. Thanks for all the help thus far, I think I am on the right track. 
|
|
#12
03-26-2016, 09:02 AM
|
|||
|
|||
|
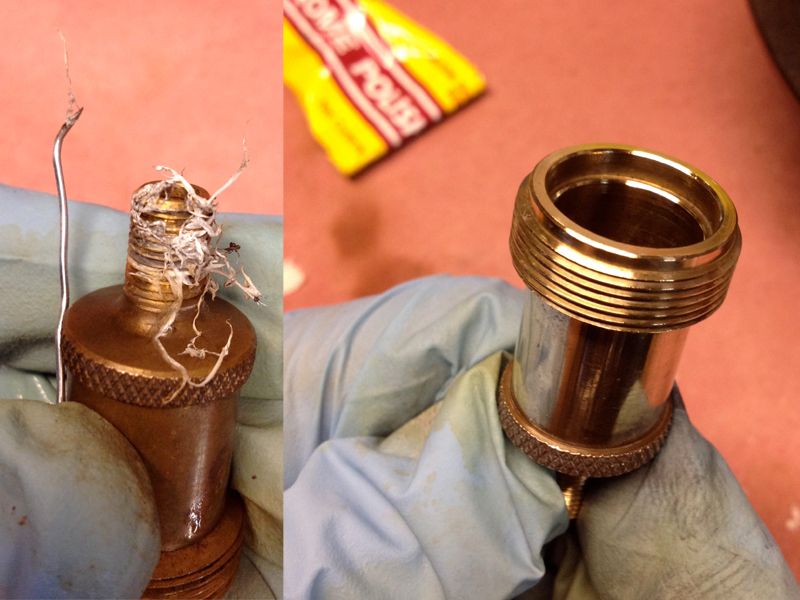
No need for Loctite. Teflon sealing tape was not used when new, but unless you are trying for a pristine restoration, Teflon tape is a good idea.
Why not just use steel wool and refinish the handle where it is? I always hated it when they came loose. The gauge is toast. get a new one. You could try bending it to zero, but it might not be accurate anymore.
__________________
Forgive me for posting dumb stuff. Chris Little Rock, AR
|
|
#13
03-26-2016, 09:14 AM
|
|||
|
|||
|
Can you put a wrench on the nut below the handle and spin the handle off? Or better yet, put that nut in a vise and then twist the handle with both hands.
|
|
#14
03-26-2016, 09:23 AM
|
||||
|
||||
|
Quote:
Silca has a bunch of replacement parts. Silca provides silicone oil with the replacement leather piece. I haven't found replacement decals yet.
__________________
You always have a plan on the bus...
|
|
#15
03-26-2016, 09:24 AM
|
||||
|
||||
|
Quote:
The handle is beginning to splinter, one large one in particular that will take a noticeable chunk out of wood. I am kind of hankering to make a new handle while I’m at it anyways. I think I just broke the gauge  the little tin protrusion that should be holding the needle at 0 fell off, I can super glue something in there. I pushed on the internals and now the needle is sitting on the A in Silca. If I glue a small stopper to hold the needle on 0 does that work? the little tin protrusion that should be holding the needle at 0 fell off, I can super glue something in there. I pushed on the internals and now the needle is sitting on the A in Silca. If I glue a small stopper to hold the needle on 0 does that work?  Quote:
|
 |
|
|


 Linear Mode

